
diy project: geometric feature wall tutorial
Step by step DIY project featuring instructions for creating your stunning geometric feature wall (with photos).
Anyone else in quarantine using this time to unintentionally get lost in the abyss that is TikTok? No? Just me? Just my kids? Tiktok is how I originally found the idea to create this stunning geometric feature wall in our 16-year-old daughter’s room. You can find photos and step-by-step instructions below.
Step one.
Prep and paint your wall(s) for paint. Clean your walls and baseboards. Use spackle to fill any nail holes and imperfections. This can be sanded when dry. Be sure the surfaces and baseboards are dust-free before you move on with paint. For our project, we decided we wanted the 1″ lines between the geometric shapes to be the same color as the other three walls in the room. So we painted the entire room first.
And because we are in the middle of a world pandemic it took two weeks for the paint we ordered online to arrive giving the wall plenty of time to cure. I would let fresh paint cure at least 48 hours before applying painters tape for your geometric feature wall.
Step two.
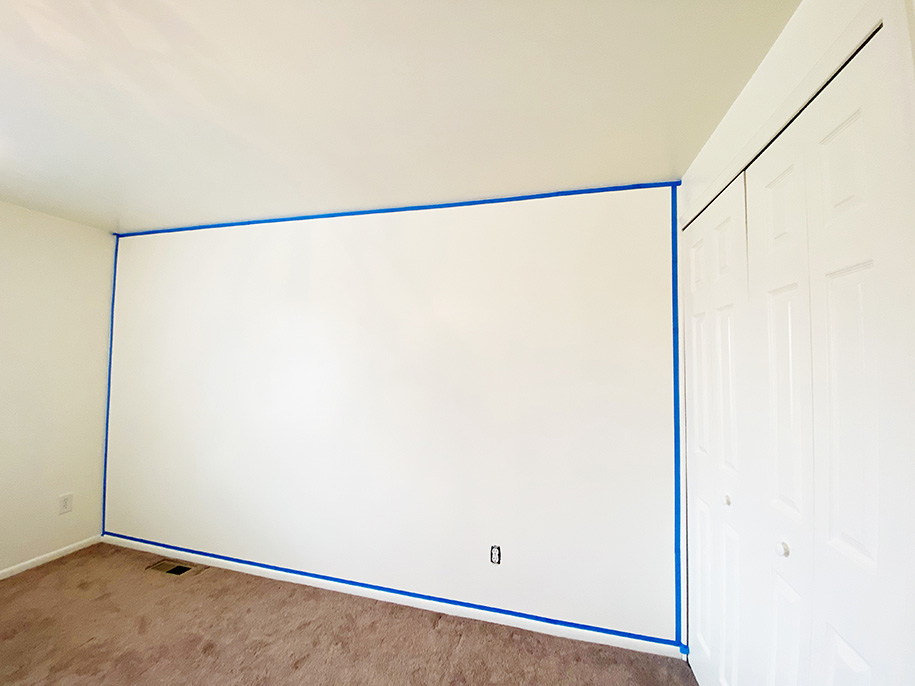
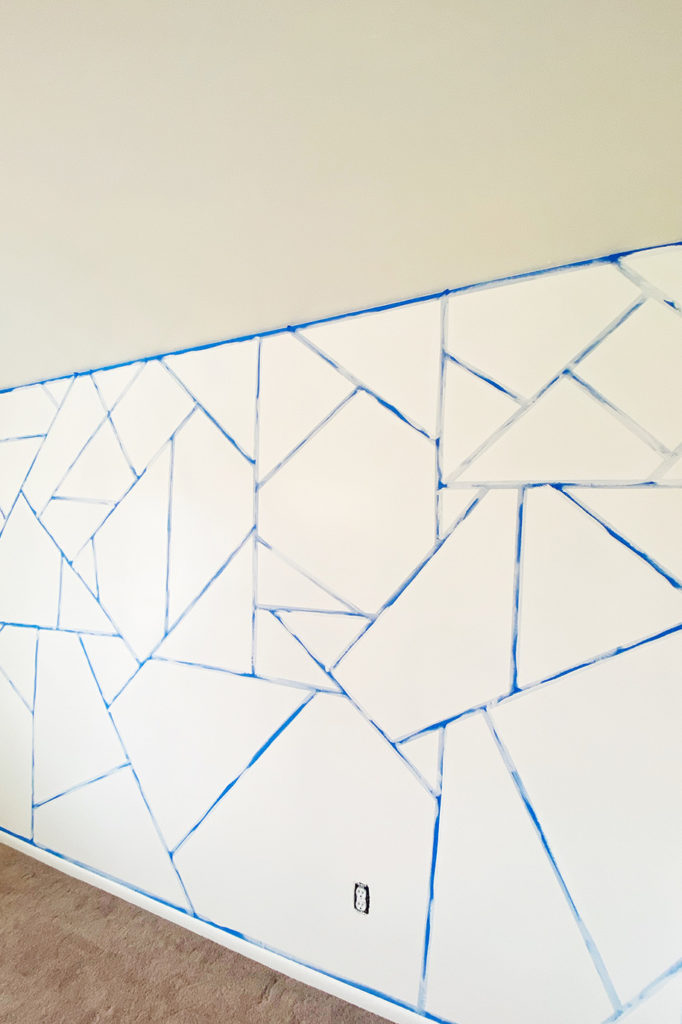
We used 1″ painters tape to first frame in the entire wall. This will prevent you from having to cut in at the ceiling, baseboard, and corners and create nice clean lines. Depending on how dramatic you want your final project to be you could use thinner or wider painters tape. Whatever tape you start with is what you should use for the entire project though, to keep things clean and symmetrical.
Step three.

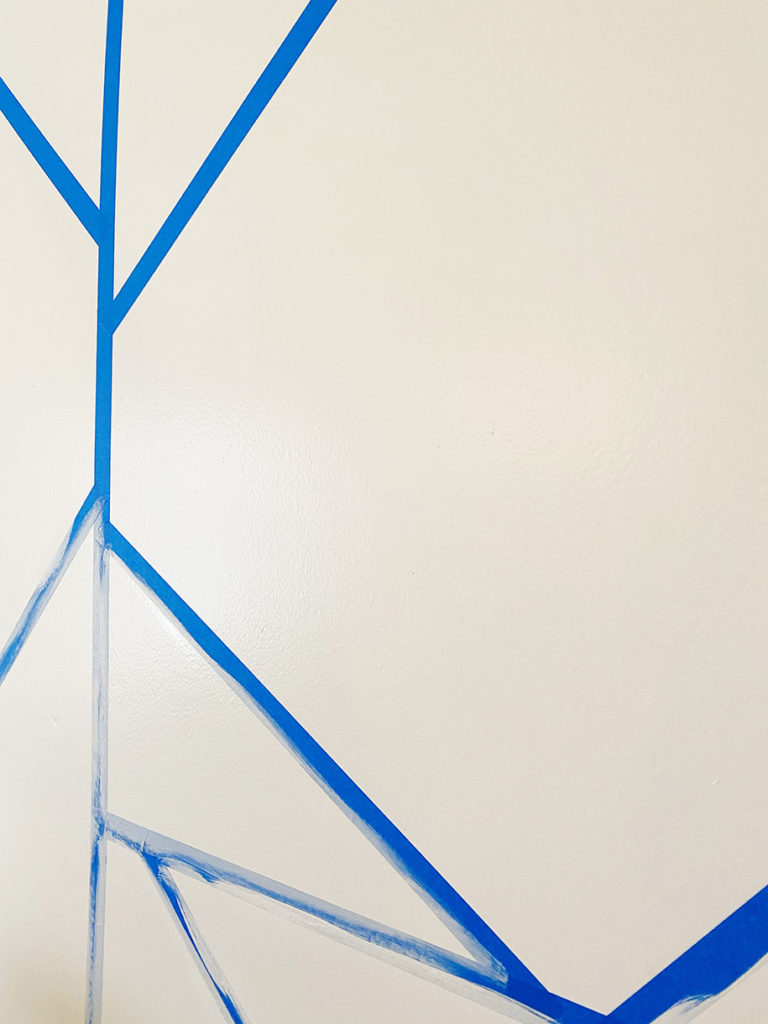
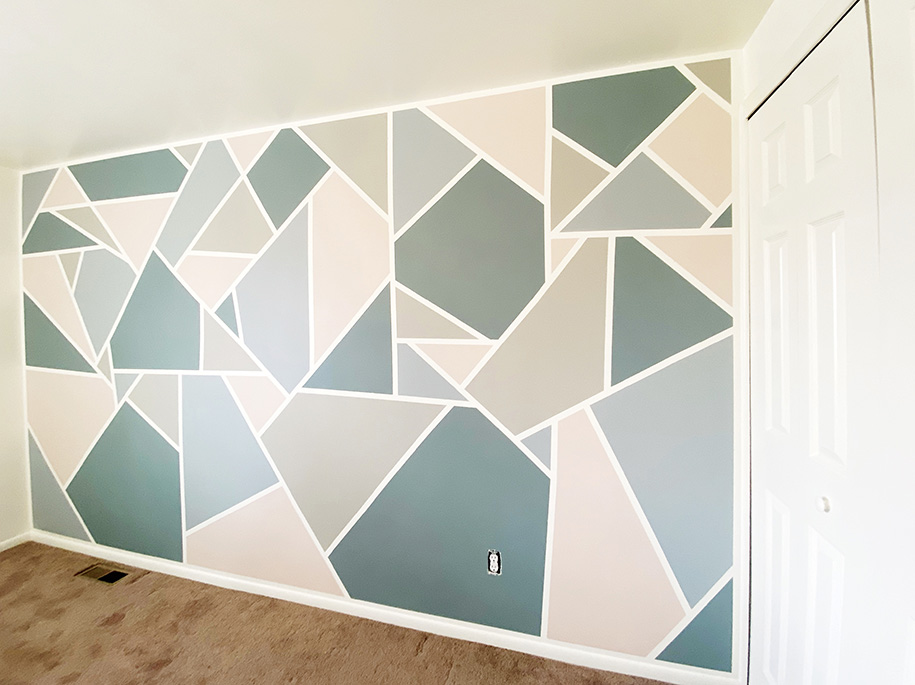
Begin creating your geometric lines. One essential thing you absolutely MUST keep in mind is that you want to create only one connection point. I’ll explain in the next photo.
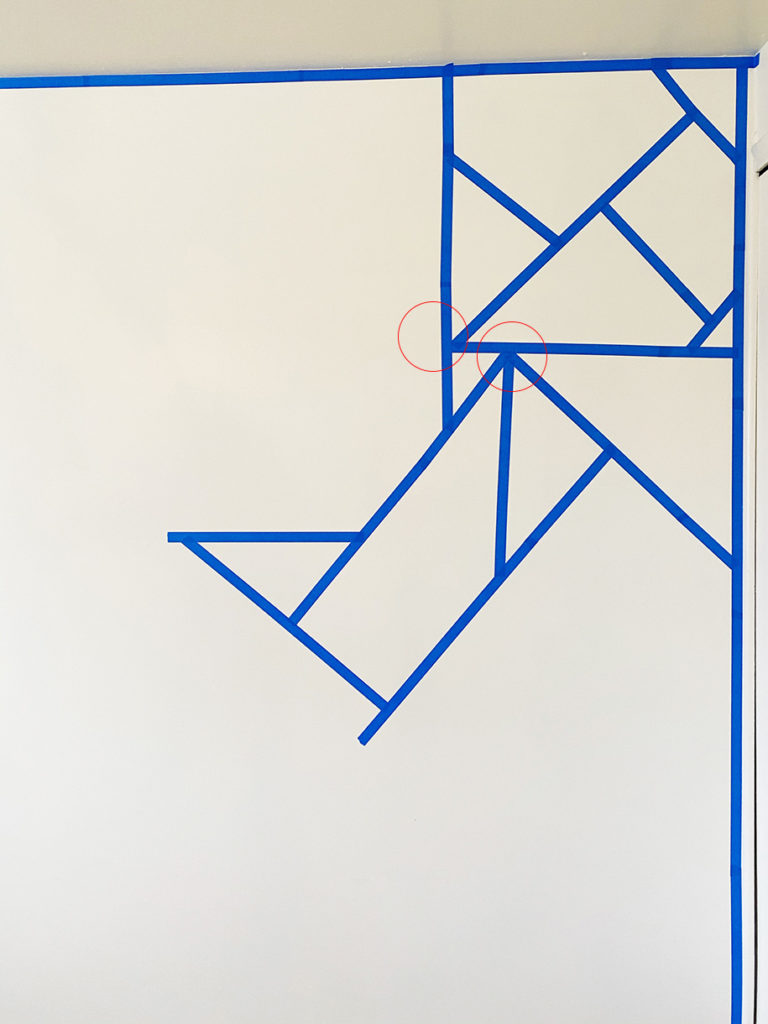
The two red circles above show where multiple lines are intersecting and I suddenly realized that I was not going to have crisp straight lines between the geometric shapes if I created shapes with more than one joint.
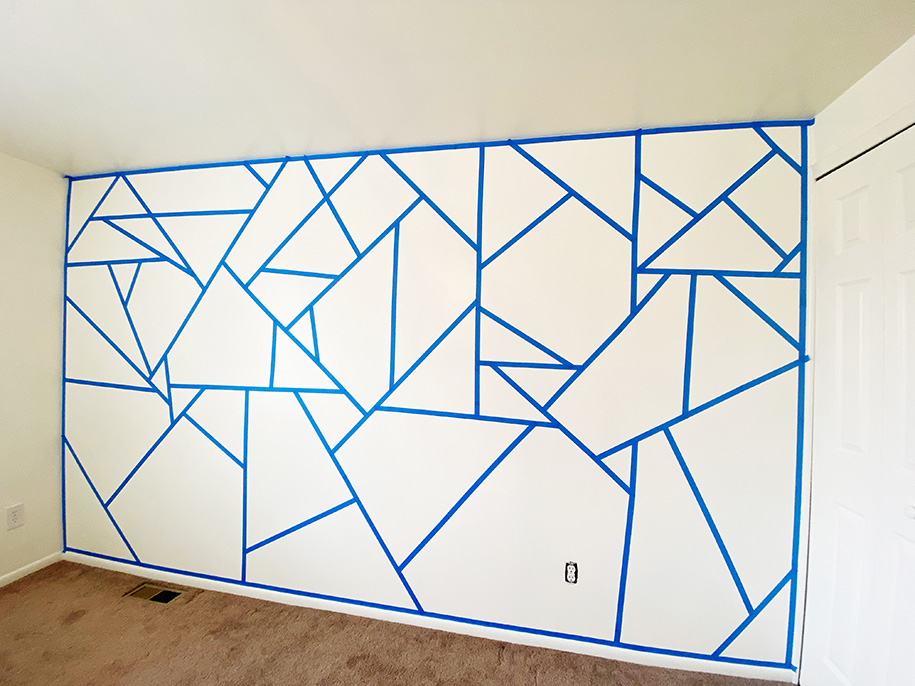
So if you go back to this photo you can see how there are no overlapping areas of painters tape. My kid wanted all triangles. Did your head just explode? Mine, too. I don’t think that’s possible. If it is, it’s way above my pay grade to figure out. So I did the best I could to create as many triangles as I could but just keeping things geometric overall. This took about an hour and both twin girls helped guide me. You can get fancy and use a level buuuuut we did not.
Step 4.
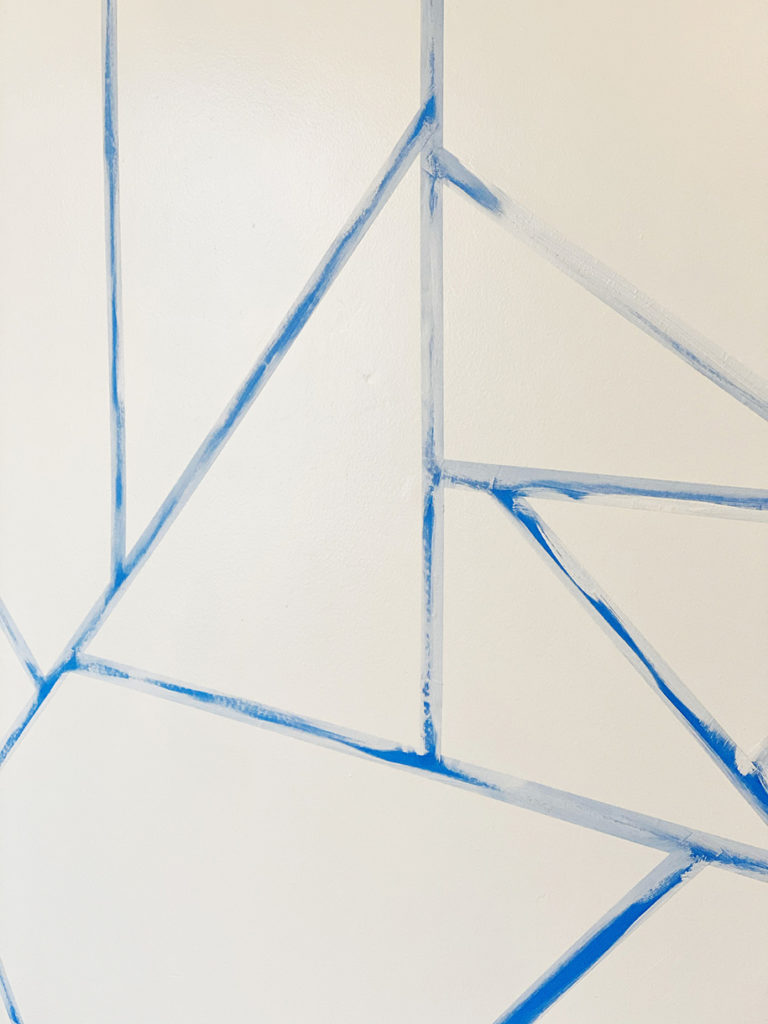
Go back to your base wall color paint and use that to paint over both sides of the painter’s tape. Be careful not to completely cover the tape so that when it’s time to color in your shapes you can still locate the edges. DO NOT skip this step. This is the secret to ensuring that your paint colors do not bleed into this neutral area and will create the cleanest and crispest straight lines between shapes. This took me about thirty minutes on an average-sized bedroom wall.
Step 5.
Map out your colors (photo below). I’ll share our color choices here. We selected four different colors, all 8 oz sample size cans from the Magnolia line at Target. These are not chalk paints. If you are hoping to order from the Magnolia line, make sure you select standard paint, not chalk paint.
Before I get to the colors and links that we selected, let me share a few tips on selecting your own colors. Even though we chose four unique colors, all four colors are on the same depth scale. You want to choose colors that coordinate and have the same color base. You can do this by searching color palettes online. Looking over color themes that others have already created. When you can return to Home Depot you can select colors from one of the pre-designed paint brochures. If you want to tackle this project now you can order Sherwin Williams paint online and do curbside pick up. A quick search on Pinterest of popular Sherwin Williams paint collections will give you a good glimpse of swatches that will look well together on one wall. I’m sure that’s all clear as mud.
Okay our colors: we chose Sunday Stroll, Sir Drake, Rainy Days, and Ella Rose.
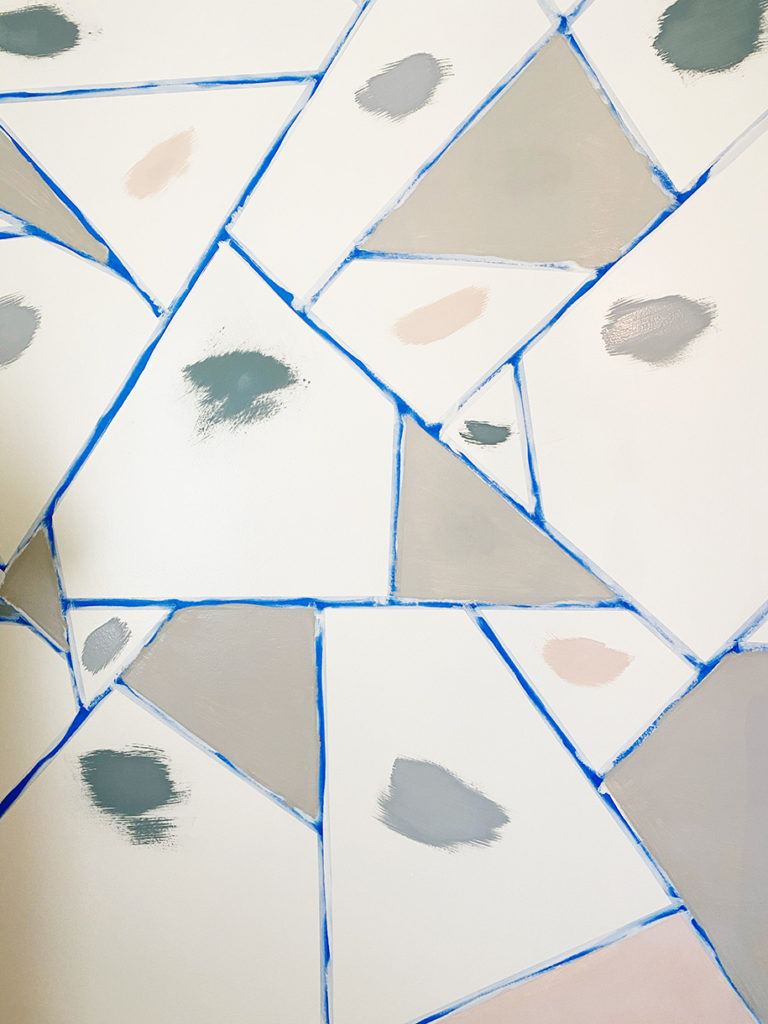
I shook the paint well and because we had 8 oz cans I just used the lids to place tiny paint dots inside each shape to layout our colors. Having four colors made it pretty easy to ensure no two shapes touched with the same color. I started at the top left corner and had my colors in the order I wanted one through four and repeated that pattern across the first ‘row’ so to speak. Once I got from left to right I went back to the left and started again. It became more difficult to follow a pattern but with a few people looking at it with me we easily laid out all the colors. Work left to right and top to bottom. Don’t try to just randomly try to populate the shapes!!
You also want to ensure that you are placing tiny thin dots so that you don’t end up with blotches that you then have to blend.
Step 6.
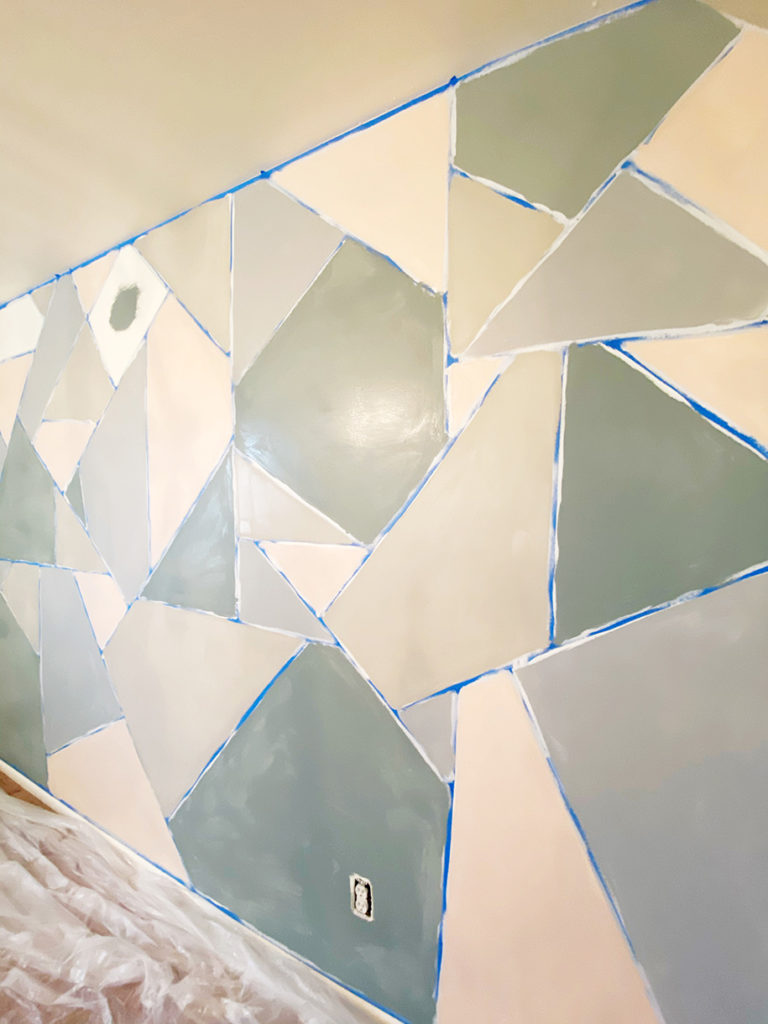
The type of paint and colors you are using will determine the number of coats. We opted for two coats. Both girls helped me paint in each shape. I did a final once over myself along all of the lines because I’m a little neurotic and a bit of a perfectionist and I wanted those damn lines to be clean. The first coat went on in the evening. We applied the second coat in the morning and I quickly touched up all the lines after that.
Step 7.
Pull the tape! In my experience, IF you didn’t skip the part where you sealed your painter’s tape with the base coat color, it’s best to pull the tape while the paint is still drying to prevent it from bleeding through. Some areas were still wet so we were careful not to hit the walls with the tape as we pulled it off.
You think watching people cut soap is therapeutic? Nah, wait until you start pulling the tape and revealing the perfect freaking lines you created!
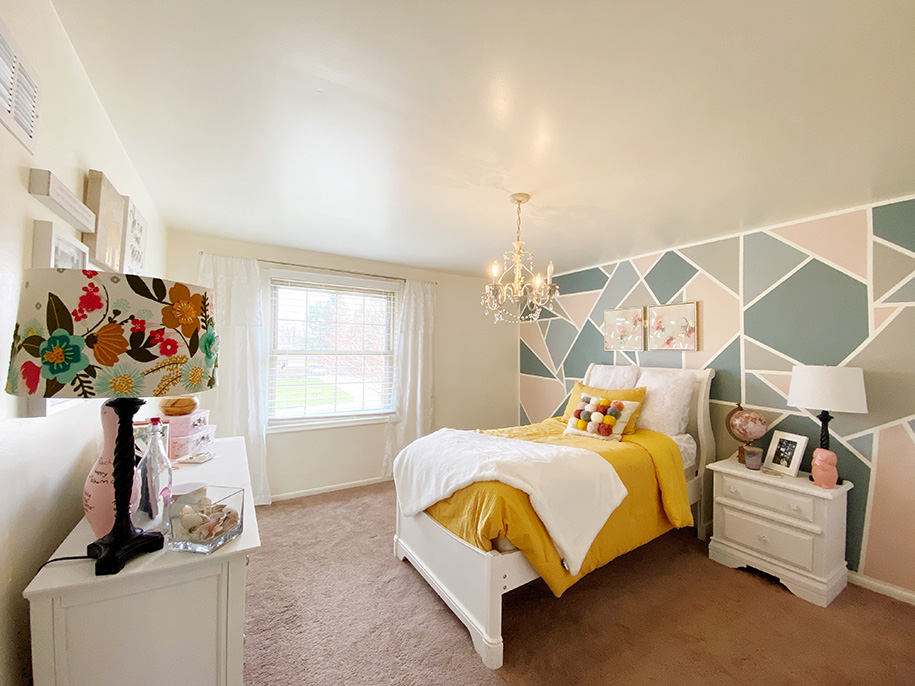
TA-DAAAAA! We are totally obsessed!!
The final reveal!
Are you going to tackle this project or another DIY like it in your own home? Drop a comment or share a photo of your project!
To find out more about me, my life, and my work, CLICK HERE!


A Community House Wedding in Birmingham
Glamorous Winter Shinola Wedding Downtown
A Fall Meadow Brook Estate Engagement
The Romance and Magic of a Winter Planterra Wedding
i do {weddings}
Classic Italian American Andiamo Wedding
i do {weddings}
Popular entries

Blog
unforgettable
and make it
Let's capture what's
real


